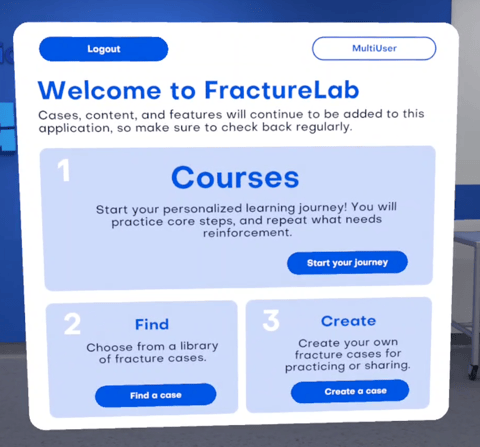
What is "Create a Case"?
"Create a Case" is a powerful authoring tool that puts you in the director's chair. It allows you to design, build, and save your own unique surgical simulations from scratch.
You can create a specific, challenging fracture pattern you encountered in real life, or design a case to perfectly test a particular skill. You define the fracture, you perform the ideal fixation, and you save the case to practice again or share with your institution.
How to Create Your Case: A Step-by-Step Guide
Creating a new case follows three main phases: Setup, Fracture Definition, and Surgical Fixation.
Phase 1: Setup
1. Select a Region: From the main menu, choose the anatomical region you want to work in (e.g., Hand & Wrist, Hip, Shoulder, Foot & Ankle).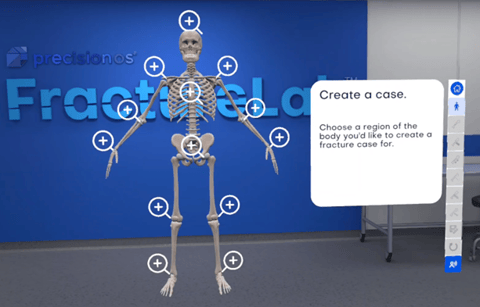
2. Select a Bone: Within that region, you'll see a list of available bones. Select the one you wish to fracture.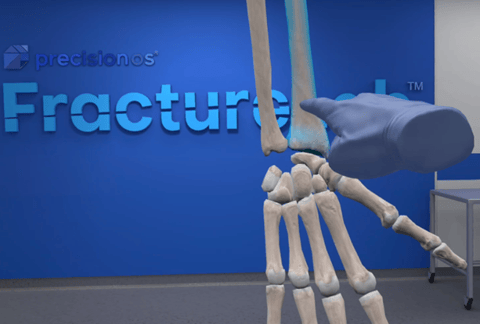
3. Choose Your OR Layout: For some regions, you will be able to select your preferred Operating Room (OR) layout from a few pre-set options to match your real-world setup.
Phase 2: Fracture Definition
This is where you design the trauma. You will see a 3D model of your selected bone.
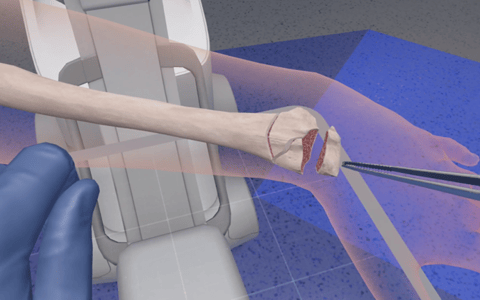
1. Define Fracture Lines: Use our 2D fracture-plane tool to place your fracture(s). You can create up to three fracture lines, resulting in a maximum of four bone fragments.
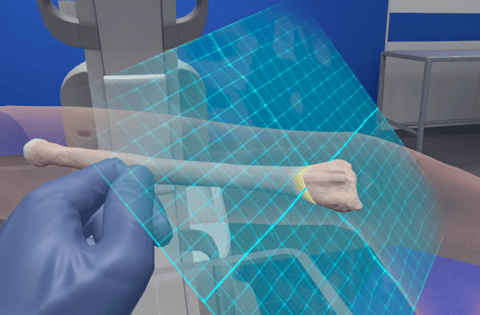
2. Set Initial Alignment (Optional): Once the fracture is generated, you can use the virtual Forceps tool to move the fragments. This allows you to set a "start-of-case" mal-alignment, creating a realistic challenge that requires reduction in the OR.
Pro-Tip: If you want the case to begin with the bone perfectly reduced, simply skip this step and leave the fragments as they are.
3. Adjust Bone Loss (Optional): The Configuration button allows you to adjust advanced parameters, such as the amount of bone lost during the fracture.
Phase 3: The OR & Saving Your Case
1. Enter the OR: Once you are satisfied with your fracture, press "Proceed to O.R." You will load into the virtual operating room with a patient on the table, presenting the exact fracture you just designed.
2. Perform Your Ideal Fixation: This is your "author's" run. Go through the procedure—performing any preliminary or definitive fixation (e.g., K-wires, plates, screws)—exactly as you think it should be done. This performance sets the "gold standard" for this case.
3. Save Your Case: When you are satisfied, proceed to the final step to save. You will be prompted to give your case a unique Title.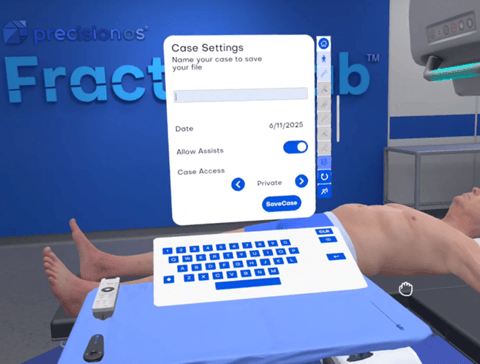
What Happens After You Save?
Saving your case unlocks two powerful features:
- Repeatable Practice: Your new case is now saved to your personal library. You can load it up at any time to practice and compare your performance against your original (author's) attempt. All hardware placements and metrics from your initial creation are saved as the benchmark.
- Institutional Sharing (For Subscribers): Do you want your entire department or residency program to practice the case you just built?
- Institutional subscribers can email Support@precisionostech.com to request that their case be made accessible to all other users at their institution.